Five Easy DIY Halloween Decorations
Hey everyone & happy Friday! It’s so hard to believe that we’re half way through the month of October, which means that Halloween is only a matter of days away now. Now, let’s talk about Halloween decorations! Halloween is one of my favourite holidays to decorate for, and I’d like to consider myself a pretty crafty & creative person. I work as a graphic designer, I’ve got this blog to create content for, and overall, I’ve always had a love for creating things right from the time I was a kid - and that includes making my own Halloween decor, so in this post, I’m going to show you five Halloween decor pieces that I’ve DIY-ed & tell you how you can make them too.
Floating Witches Hats
This is a really fun decoration to have if you have an overhang above your door that allows for multiple hats to be hung up, much like my family and I do. Although it’s a simple DIY, it does require sewing some fishing wire through the hats, so you may need to do some googling on tying knots with the wire to make sure it stays on, otherwise it’s easy as anything, and doesn’t cost a whole lot to make.
Floating Witches Hats
What You Will Need
- Witches Hats in varying sizes
- Command strips & hooks
- Clear fishing wire
- Sewing needle
- Scissors
- Zipties, tape or tacky gum (Optional)
Directions
- Start by putting the Command Strips on the hooks, and getting up on a ladder to attach them to the ceiling in random form. You want to try and space them out evenly without it looking too much like a pattern. You’ll want to allow some time for the Command Strips to cling to the ceiling, so I’d leave them for a day or more, if you can.
- Take your fishing wire, cut it at whatever length you’d like the hat to hang down, and sew it onto the tip of the hat, tying it off with a strong knot so that it doesn’t come apart or fall off the hook once you hang it. Repeat this with all of your hats, cutting the fishing wire at different lengths so each hat hangs at varying heights. Just keep in mind not to cut the wire too long so people don’t walk into them.
- When all of your hats have wire attached, you’ll then hang the hats from the hooks on the ceiling of your over hang. You will want to wrap the wire around the hook a few times to stop them from flying away in strong wind (believe me, I learned from experience… we lost a hat a couple of years ago because of this). You can even tie them down with zip ties, which is what we choose to do, or add some tape or tacky gum to hold everything in place.
Magnetic Spiders
A staple Halloween decoration for me is a good ole fuzzy spider. But, if I’m being perfectly honest - I hate real spiders. I don’t want them near me at all, so of course I’m not exactly a huge fan of the super realistic looking ones that a lot of Halloween stores sell, so I decided to make some cute ones of my own! I happen to have a metal door that magnets stick to, so I thought these guys would look super cute crawling all over the door, but look a lot more inviting & less creepy to the little ones who come up to trick-or-treat on Halloween night. And bonus, this is once again, a really easy, and cheap little Halloween decoration to make.
Magnetic Spiders
What You Will Need
- Black pom poms in two sizes
- Black or shimmery black pipe cleaners
- Strong magnets
- Hot glue gun
Directions
- Start by hot gluing a small pom pom onto a larger pom pom, essentially attaching what would be the spiders head to the spiders body, and then allowing it to dry for a few minutes. While the pom poms dry, you can grab 4 pipe cleaners, and take each one and fold it in half. You’re going to want to create a bend in the legs of the spider. You’ll want to create a bend to wrap under the bottom of the body, and then two more bends to shape the legs.
- Once all of your legs are made, you’ll want to hot glue or wrap all four pipe cleaners together, with four legs on either side of the spiders body. Once the pipe cleaners are dry, hot glue them to the body, and allow to that to dry. You can move and reshape the legs as needed as this point.
- Lastly, you just need to glue your magnets onto the pipecleaners at the base of the spiders body. Once this is done, allow that to dry for a few minutes (or as long as you possibly can) - and then you get to attach them to your door!
Wandering Eye Flowers
Obviously because it’s Halloween, everything has to be a little creepy looking - right down to the florals. These flowers look super good (and creepy) either just one on it’s own, or in a bunch placed in a vase, and of course, because I clearly don’t like to make things too complicated or expensive, this DIY is another one that’s easy on the mind and wallet. The best place I found to find black roses was once again, the dollar store. They look pretty good, and aren’t outrageously expensive like some other stores can be. We also found the faux eyeballs there, however if you want something more realistic looking, you may want to try looking somewhere else, but be aware, you don’t want anything too heavy or else your flower may not stand up well, or at all.
Wander Eye Flowers
What You Will Need
- Faux black roses (or colour of your choice)
- Fake eyeballs
- Hot glue gun
Directions
- Depending on the roses you buy, you may need to remove some of the centre petals to allow room for the eyeball to fit in the middle of the flower. If you need to do this, you may want to hold onto some of the petals to mimic eyelids if that is the look you’re going for.
- Add some hot glue to the back of the faux eyeball, and place it in the centre of the rose, holding it for a couple of minutes until the glue has had some time to dry. Repeat this with as many flowers as you’d like. Once you’re done, add them to a vase, or do whatever you’d like with them!
Halloween Wreath
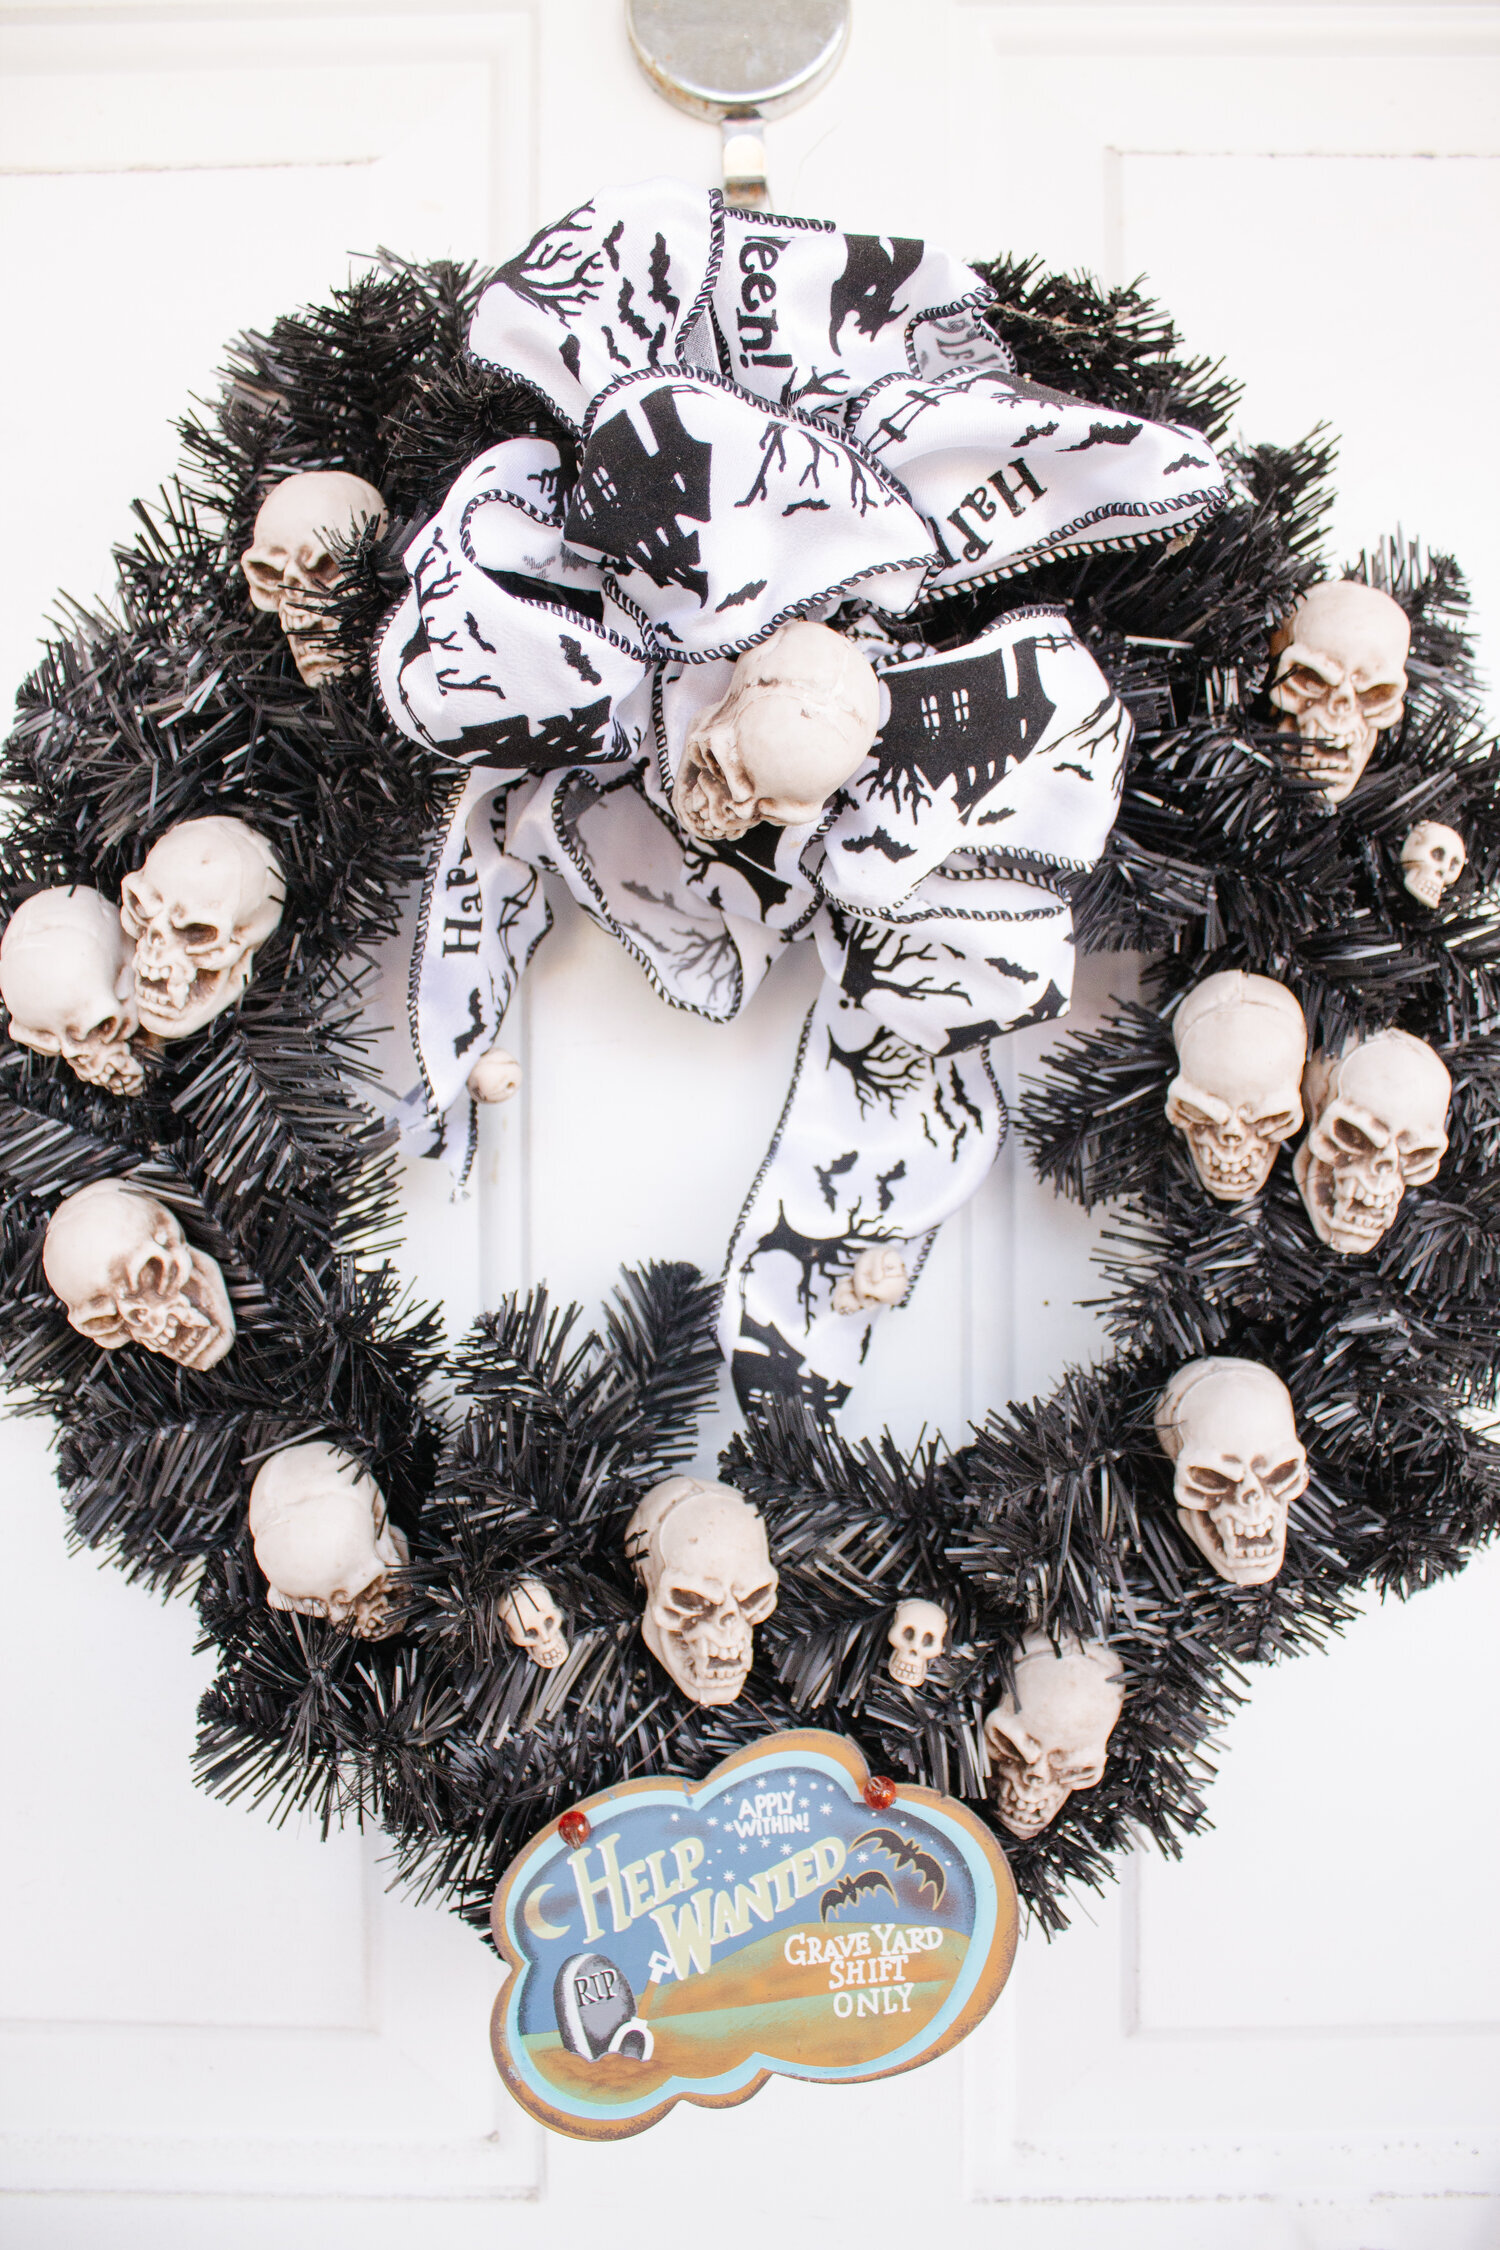
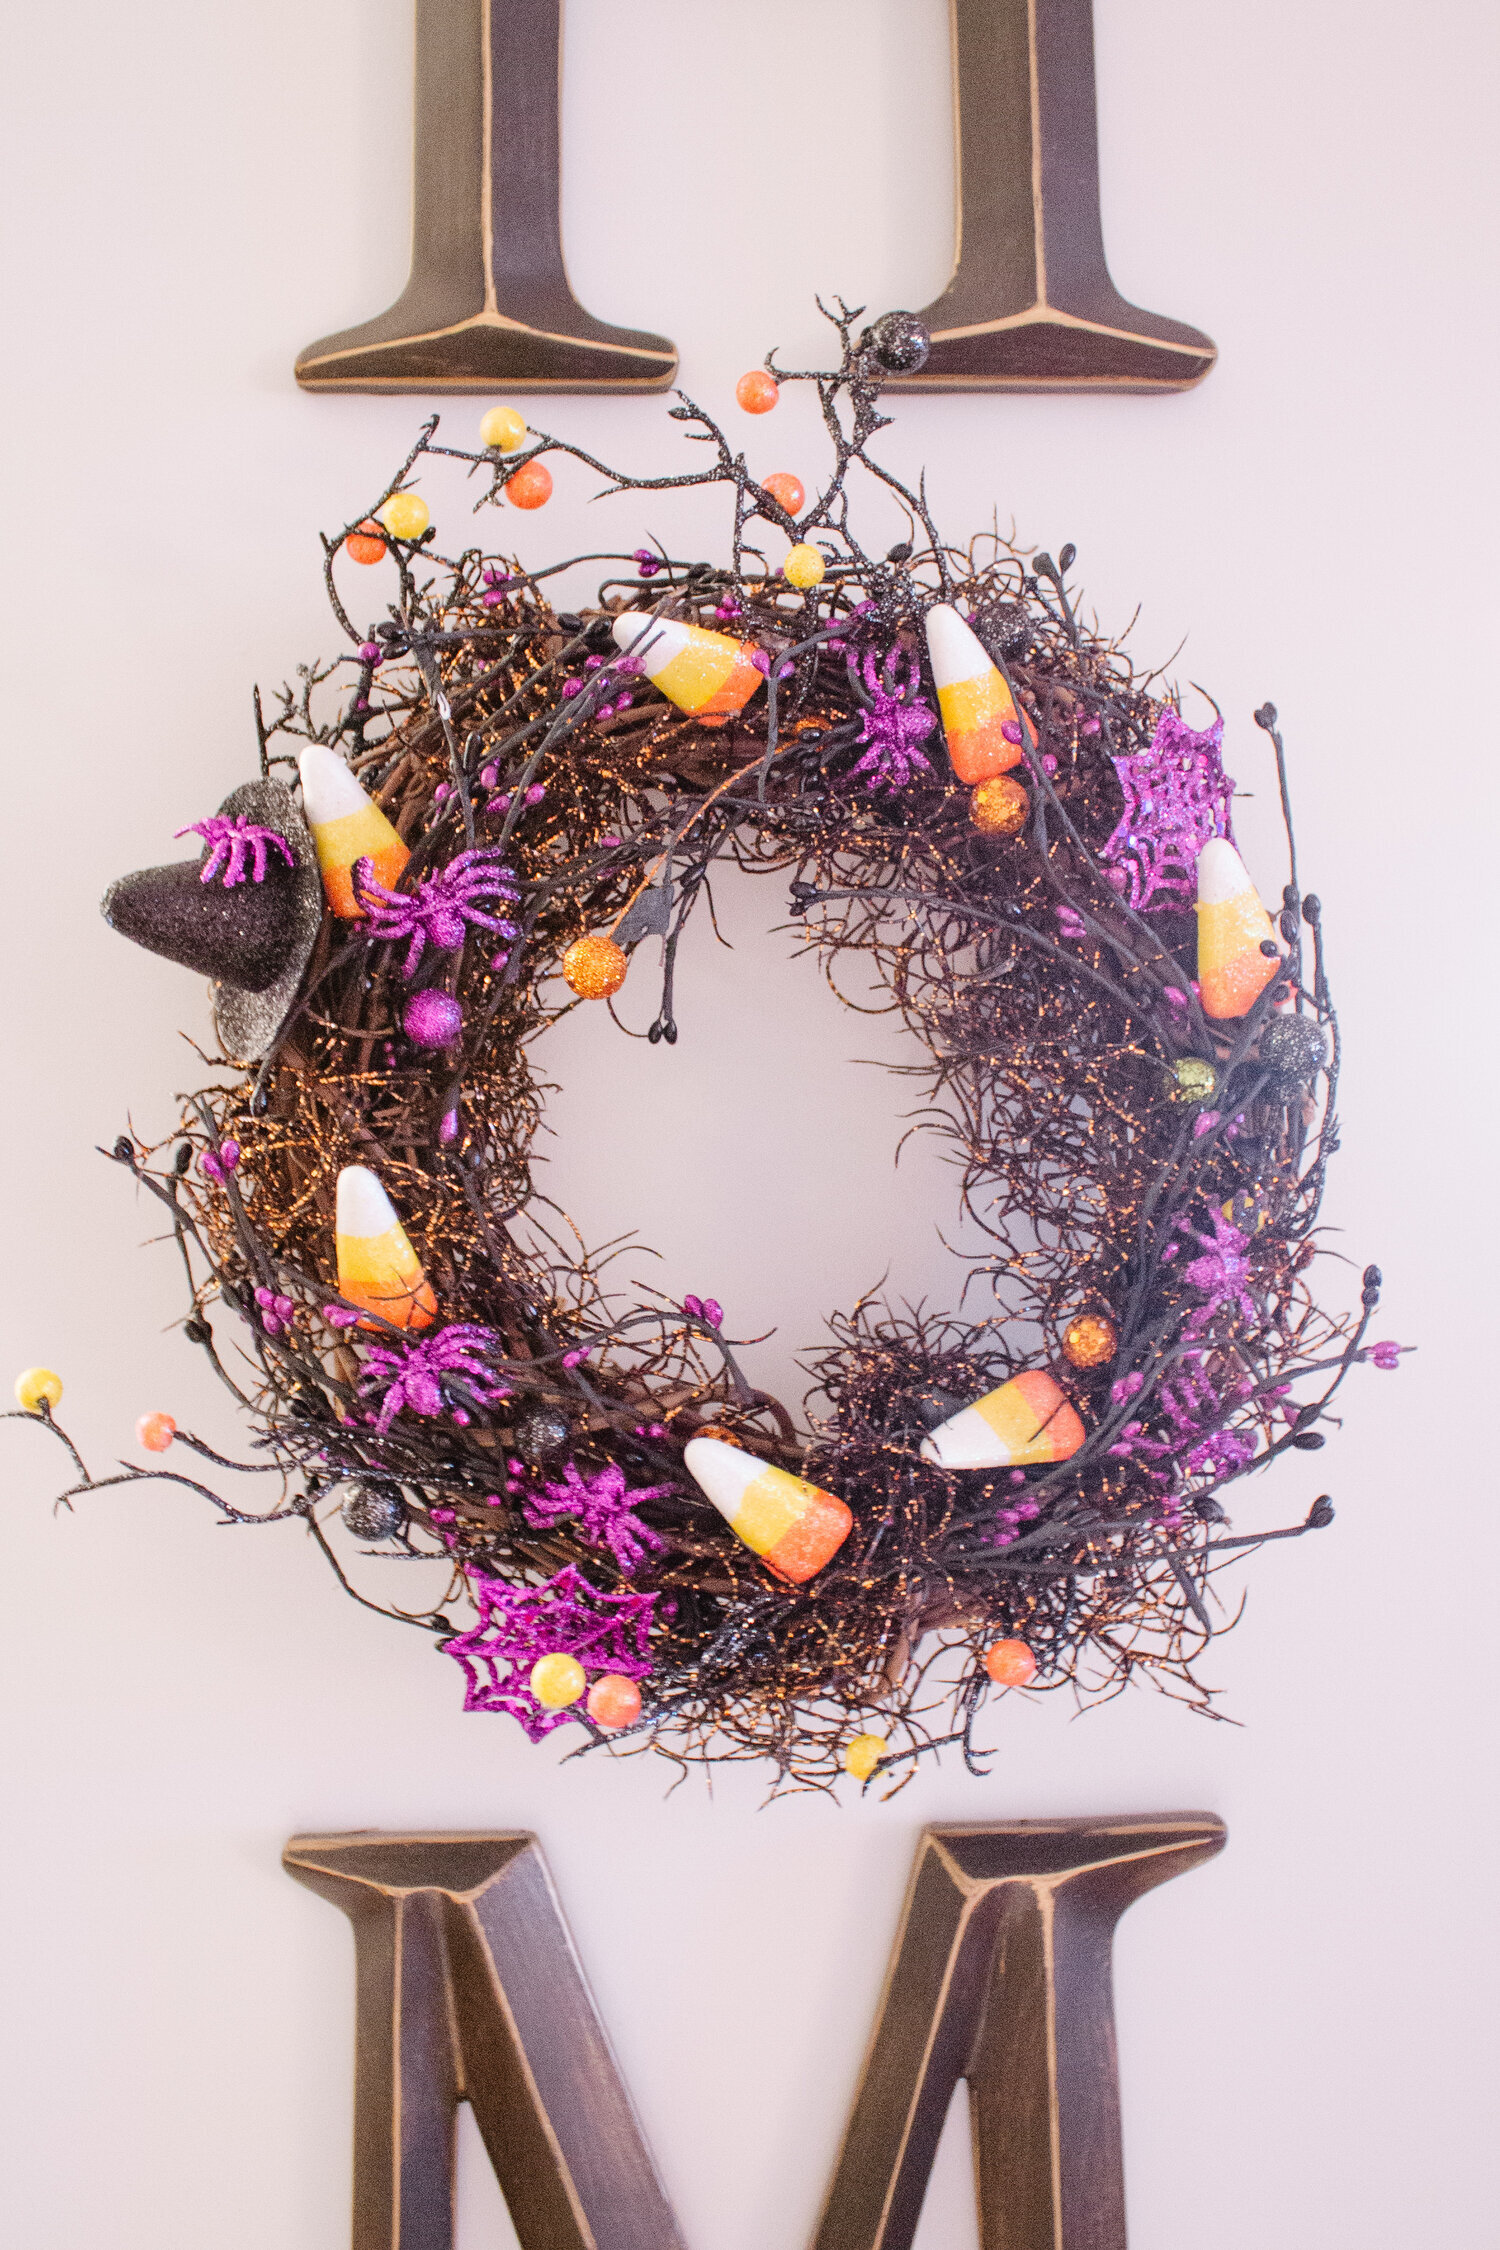
This DIY is probably the most expensive of all of them. Generally, it’s costed me anywhere between $40 - $100 CDN to make these two wreathes that we’re showing here, but it is a really fun little craft to do, and you end up with a really unique Halloween wreath since you’ve personalized it from the get-go. Of course, there’s really no right or wrong decorations for these, so I’ve listed some suggested materials below for you to create your own wreath.
Halloween Wreath
Suggested Materials
- Black wreath
- Hot glue gun
- Fake eyeballs, spiders, bats, skulls, skeletons, etc.
- Witches hats
- Candy corn decorations
- Small Halloween-themed sign
Directions
- Hot glue your decorations of choice onto your wreath.
The nice thing about making a wreath, is you can make it big or small - whatever your budget allows for. The first wreath on this post is one my family actually made many years ago, so I’m sure it costed a lot less to make then, but this is a large wreath that we’ll hang on a door around Halloween time. The second wreath is apart of our HOME sign that we have hanging in our living room, adding a little Halloween touch to the inside decor!
Halloween Ribbons for Planters
Last, but of course not least - the simplest DIY of them all, using ribbons for decor on your outdoor planters. My first suggestion would be to not put these out too far before Halloween since it could rain and any sparkle that’s on the ribbon could come off, and generally, the rain could ruin the look of the ribbons.
Halloween Ribbons for Planters
Suggested Materials
- Halloween ribbon of varying thickness
- Scissors
Directions
- Start with your thickest ribbon that has a simple pattern, and wrap it around your planter, measure & cut. Remember to leave enough room to be able to tie it, or tie a bow if you should choose.
- Once your thickest ribbon is wrapped onto the planter, grab your thinner ribbon, and follow the above steps.
Well, I hope that these little DIY’s inspired you to create some of your own! I know we’re pretty close to the big day at this point, but I’d venture to say most of them are doable before October 31st rolls around. Please let me know if you try making any of these, and Happy Halloween!


