

How to Grow Ranunculus & Anemones for Beginners
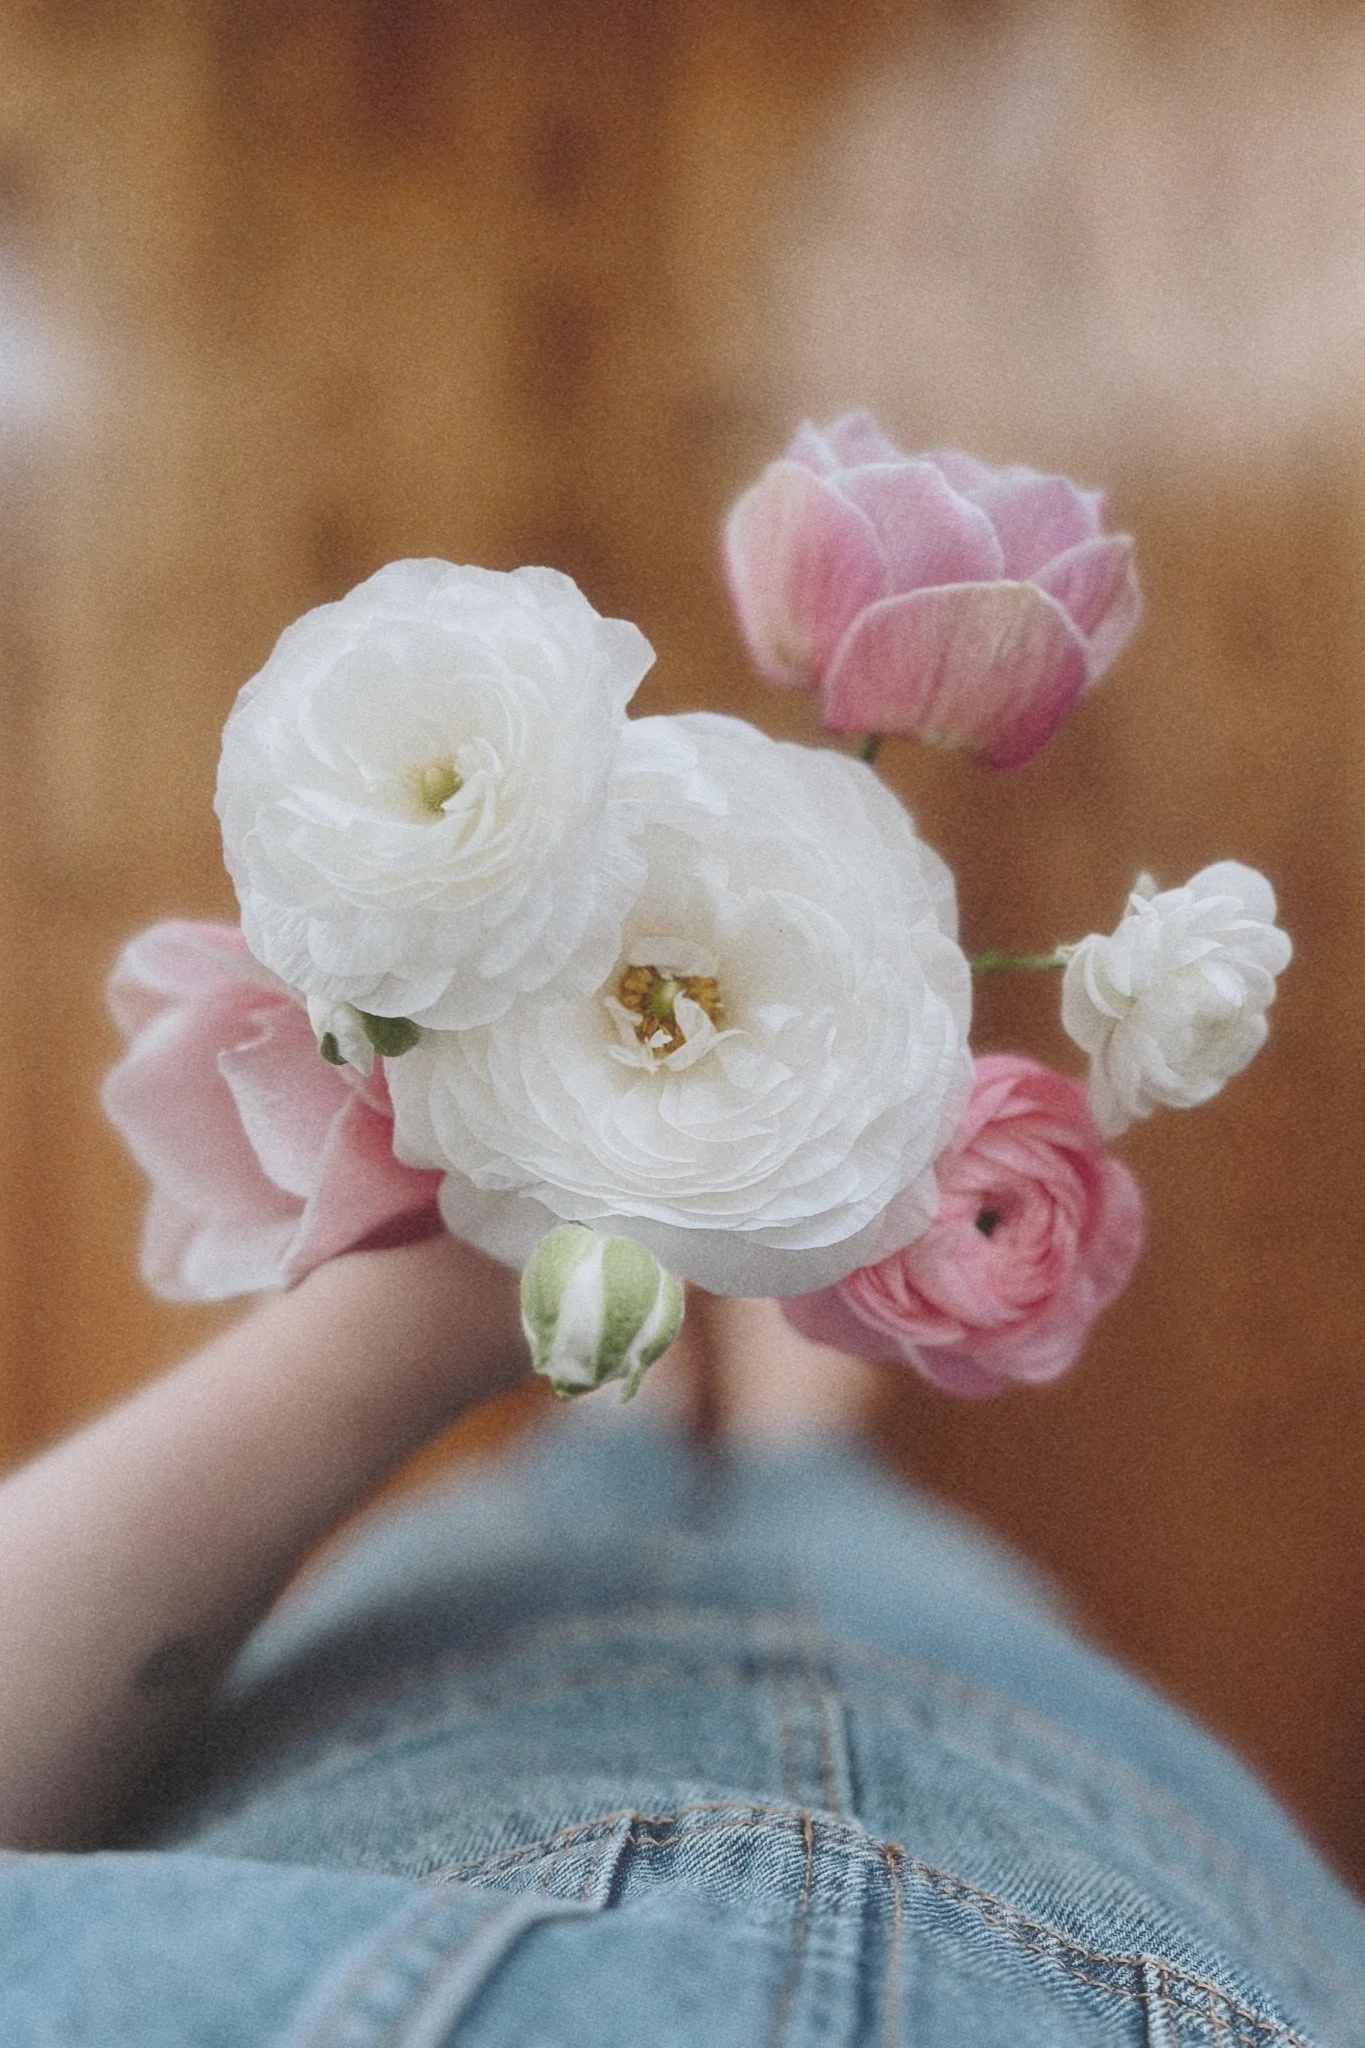
Ranunculus and anemones are truly some of my favourite flowers to grow in our garden every year. 2025 will be my third year growing them, and I’m so excited to have a gorgeous array of whites, pinks and purples in my spring bouquets this year. A little bit to know about ranunculus and anemones is that they are a cool weather flower, meaning that they actually can be planted out a little bit before your last frost date (about 2 weeks early is good), and they make an excellent cut flower, with a strong vase life, and a the-more-you-cut-the-more-they-produce growth rate!
They are a lovely, delicate flower, and in fact, I often hear people saying they love ranunculus especially, but have no idea what they’re called! The way these flowers grow in comparison to others is quite unique as instead of growing from a seed, or even a bulb or tuber, they grow from something called a corm, which happen to also be… really quite ugly, and rather tedious to get started. Let’s talk about how to take these interesting corms, and turn them into something truly beautiful!
What are Corms?
Similarly to a bulb or tuber, they are like an organ from which your plant grows, instead of a seed! Ranunculus corms and anemone corms look quite different too, with ranunculus corms resembling almost like a little spider (and sometimes even look hairy), and anemone corms looking somewhat like a canine tooth, or a large raisin. When you order and receive your corms, you will be receiving them dry, which is where the tedious pre-sprouting step comes in, and makes these flowers a laborious, but highly worth it plant to grow in your garden this year.


How to Pre-Sprout Ranunculus & Anemones
As I mentioned, pre-sprouting your corms is a tedious task, but well worth it. Like with any other plant, it’s best to know your zone, and last frost date. Since I’m in zone 5b, with a last frost date of May 1-10, I will be starting my corms in mid-March to plant out by mid-April. Knowing your zone and last frost date are key to ensure these are ready to be planted into your garden at the right time.
To make this rather lengthy process as straightforward as possible, I’ll divide how you soak, and pre-sprout your corms into 3 steps:
STEP 01. If you ordered multiple colours and varieties, I highly recommend dividing your corms into mesh bags & labelling them with masking tape, or something that you can write on to keep track of which is which – I promise, you’ll lose track of which is which if you don’t (keep in mind that these mesh bags will most definitely get dirty later in the process. I like to use reusable mesh grocery bags as they have a drawstring closure, and are washable). While dividing your corms into bags, fill up a bucket with enough room temperature water to fully submerge all of your corms, and place your filled bags into the water, and let your corms sit in the water for 4-6 hours to plump up. You will also need to keep the water aerated by either running the tap so that it drips into the water, changing the water every hour or so, or using an aquarium bubbler.
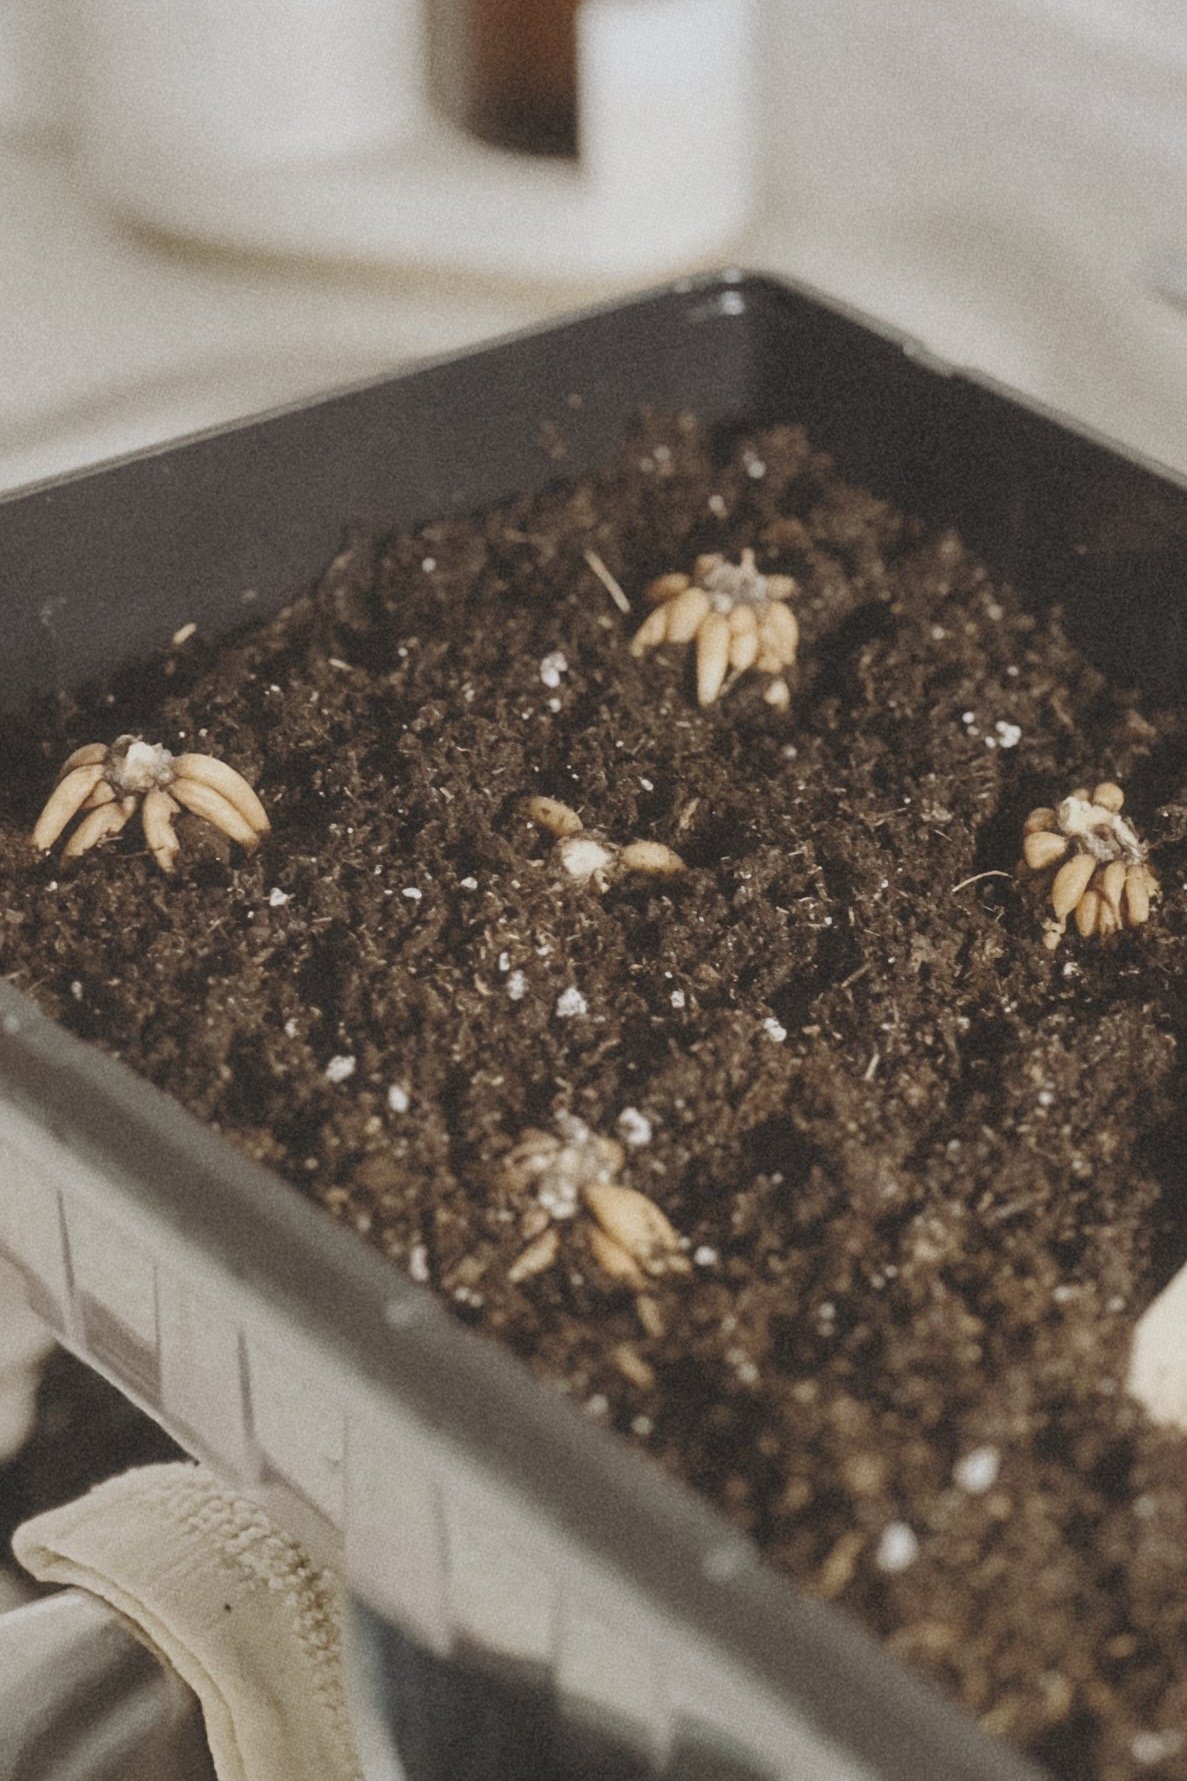
STEP 02. After 4-6 hours, you can remove your corms from the water. You will notice that they are larger at this point from soaking up the water. Dump your water, and fill up your bucket with soil (I recommend OMRI-certified organic soil from Pro-Mix (🇨🇦)), and moisten the soil. You don’t want the soil to be too dry or soaked, just moistened – a good trick is to take a handful of soil and squeeze it into your hand. If it crumbles apart, it’s too dry (add more water). If excessive amounts of water come out, it’s too wet (add more soil). If you squeeze the soil, and it mostly holds its shape, this is what you’re looking for! Fill up a tray about half way with your moistened soil (you can use one with cells, or a flat bottomed tray), and place your corms into the soil. Ranunculus will go with the “feet” facing down, and anemones will go with the pointed end facing down. Ensure you’ve got an organized system to keep track of your colours & varieties such as plant tags or separate trays that are labelled. Cover your corms entirely with the rest of your moistened soil.
STEP 03. Now time to tuck your corms in for a 2 week rest! Yes, you read that right – 2 weeks. You will need to place your corms in a cool, dark place that’s about 4-10°C for 2-3 weeks to allow them to pre-sprout, checking on them every couple of days to ensure that soil is still moist. In my experience, I’ve needed to remoisten the soil every couple of days. After about 2 weeks time, you’ll notice your corms are grow little white roots that somewhat resemble hair, and at this point you can either pot them up into a larger nursery pot, and place them under a grow light for a couple of weeks, or if your roots are about 1/2” long, you can plant them outside 2-3” deep into the soil.
Caring for Ranunculus & Anemones in the Garden
Though your ranunculus and anemones are cold weather flowers, freezing temperatures can still do damage to them. If temperatures are dropping below 5°C, cover them with a frost/shade cloth. As the spring heats up and leads into summer, the temperatures will start to get a little toasty for the flowers. When temperatures are around 20°C, you should also cover them with a frost/shade cloth to ensure they don’t get too much intense sunlight and heat. These flowers will last typically until around June, maybe into July if you’re lucky, and by mid-summer, it’s time to say goodbye to these cool weather beauties for another season!
Where to Buy Ranunculus & Anemone Corms
If you’re not sure where you can purchase corms from, and want to grow them in your garden this year, consider checking out some of my favourite Canadian growers who I’ve had great success with:
· Dahlia May Flower Farm (🇨🇦)
· Antonio Valente Flowers (🇨🇦)
· Whistling Prairie Flowers (🇨🇦)
If you’re curious what varieties I’ll be growing in my garden this year, here is what I’ve got waiting for me to get them pre-sprouted:
· Ranunculus: ‘Bianco’ (White) & ‘Rosa Chiaro’ (Pink) & Purple Jean (Purple).
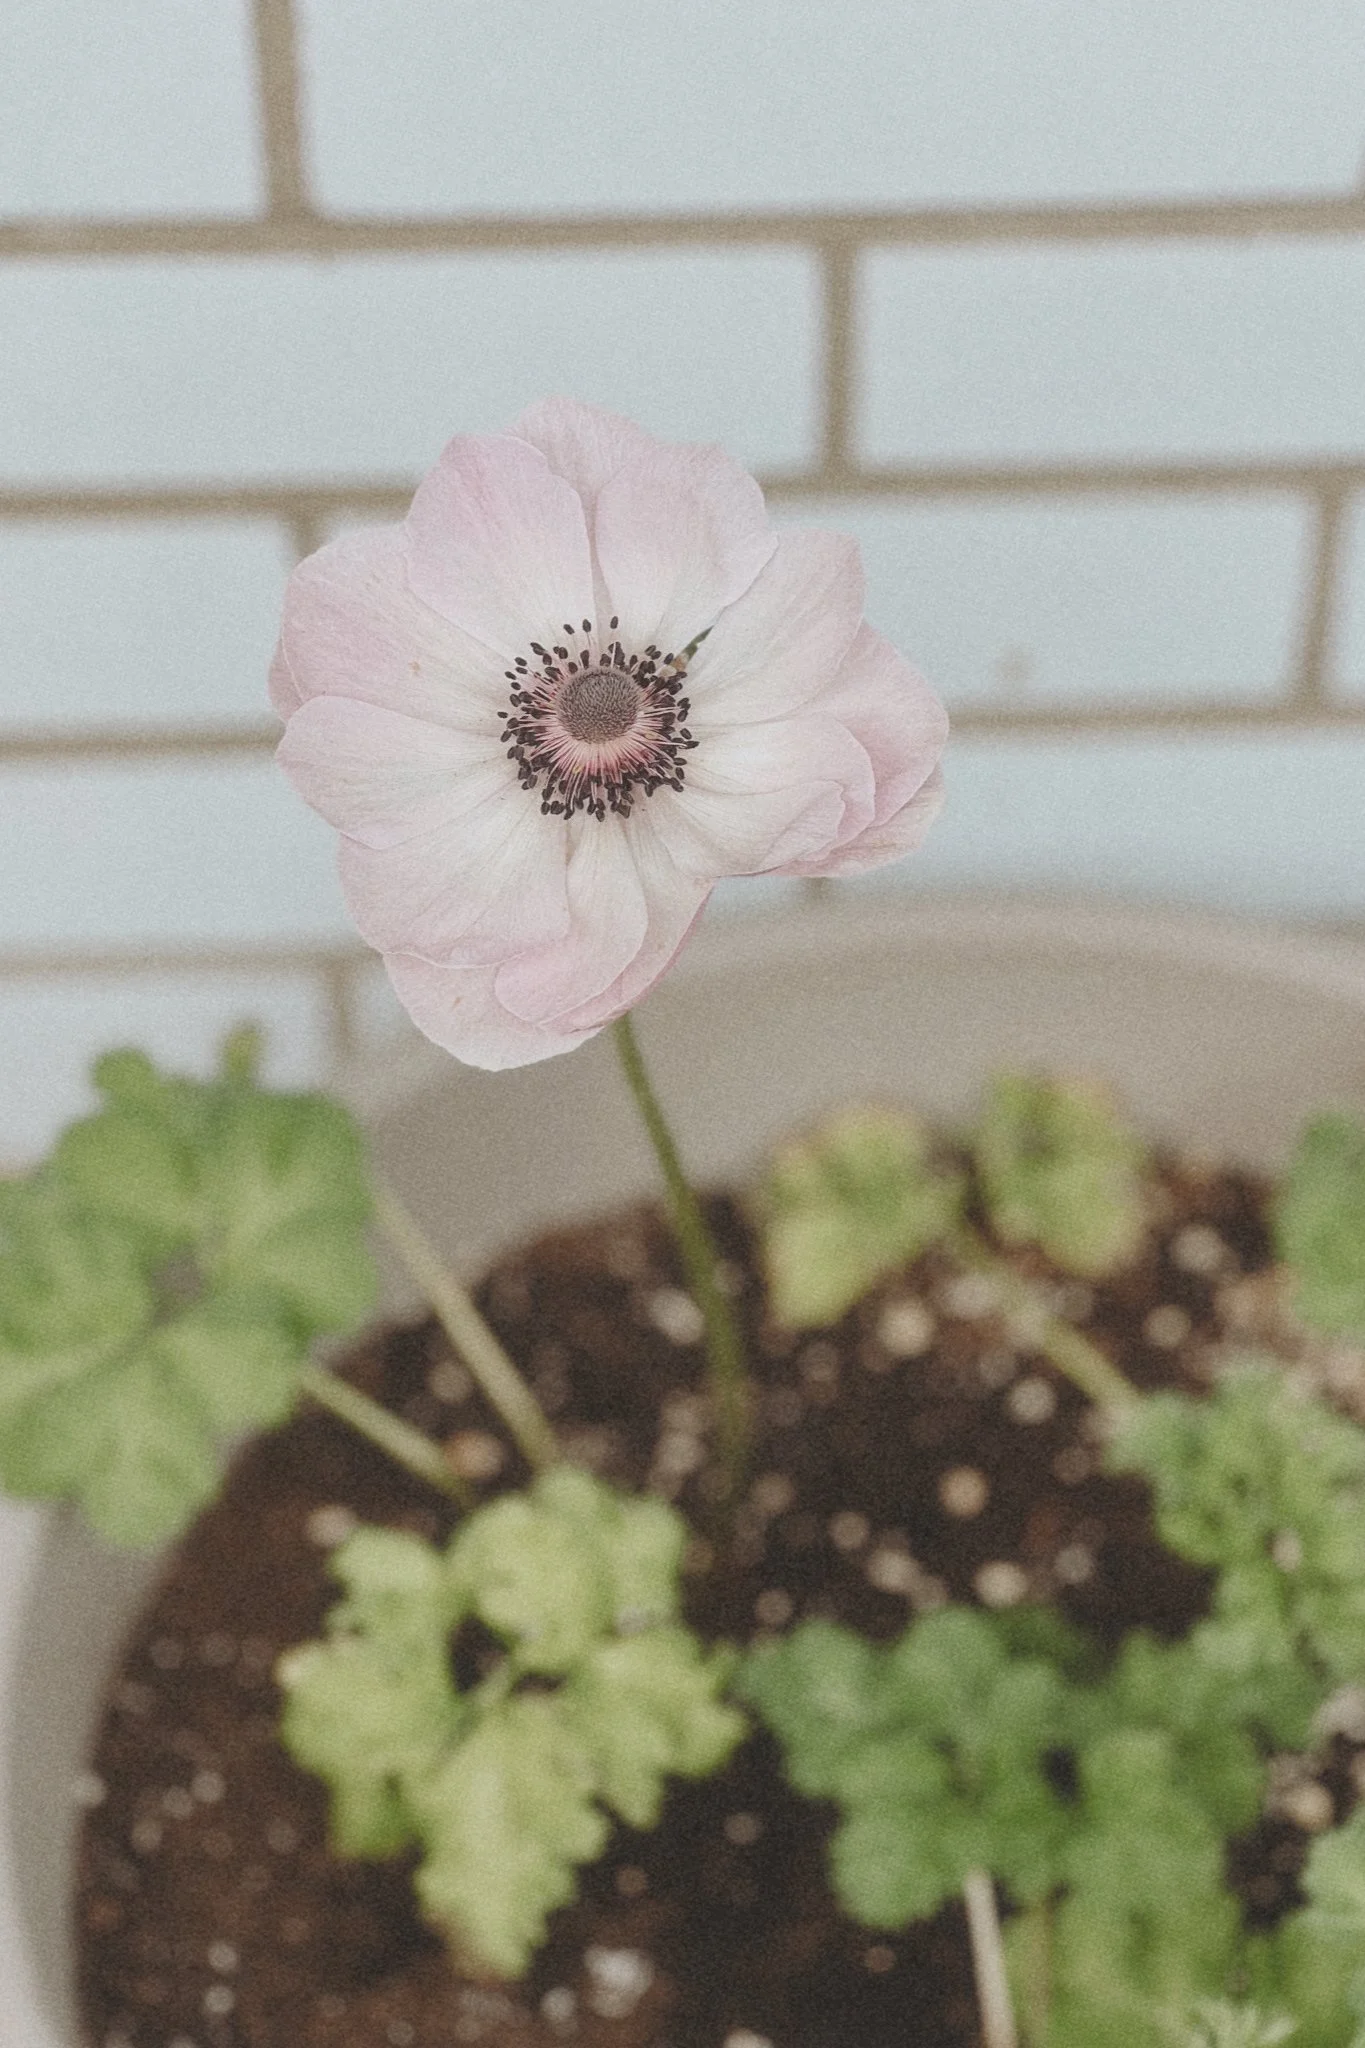
· Anemones: ‘Rarity’ (Soft Pastel Purples & Pinks).
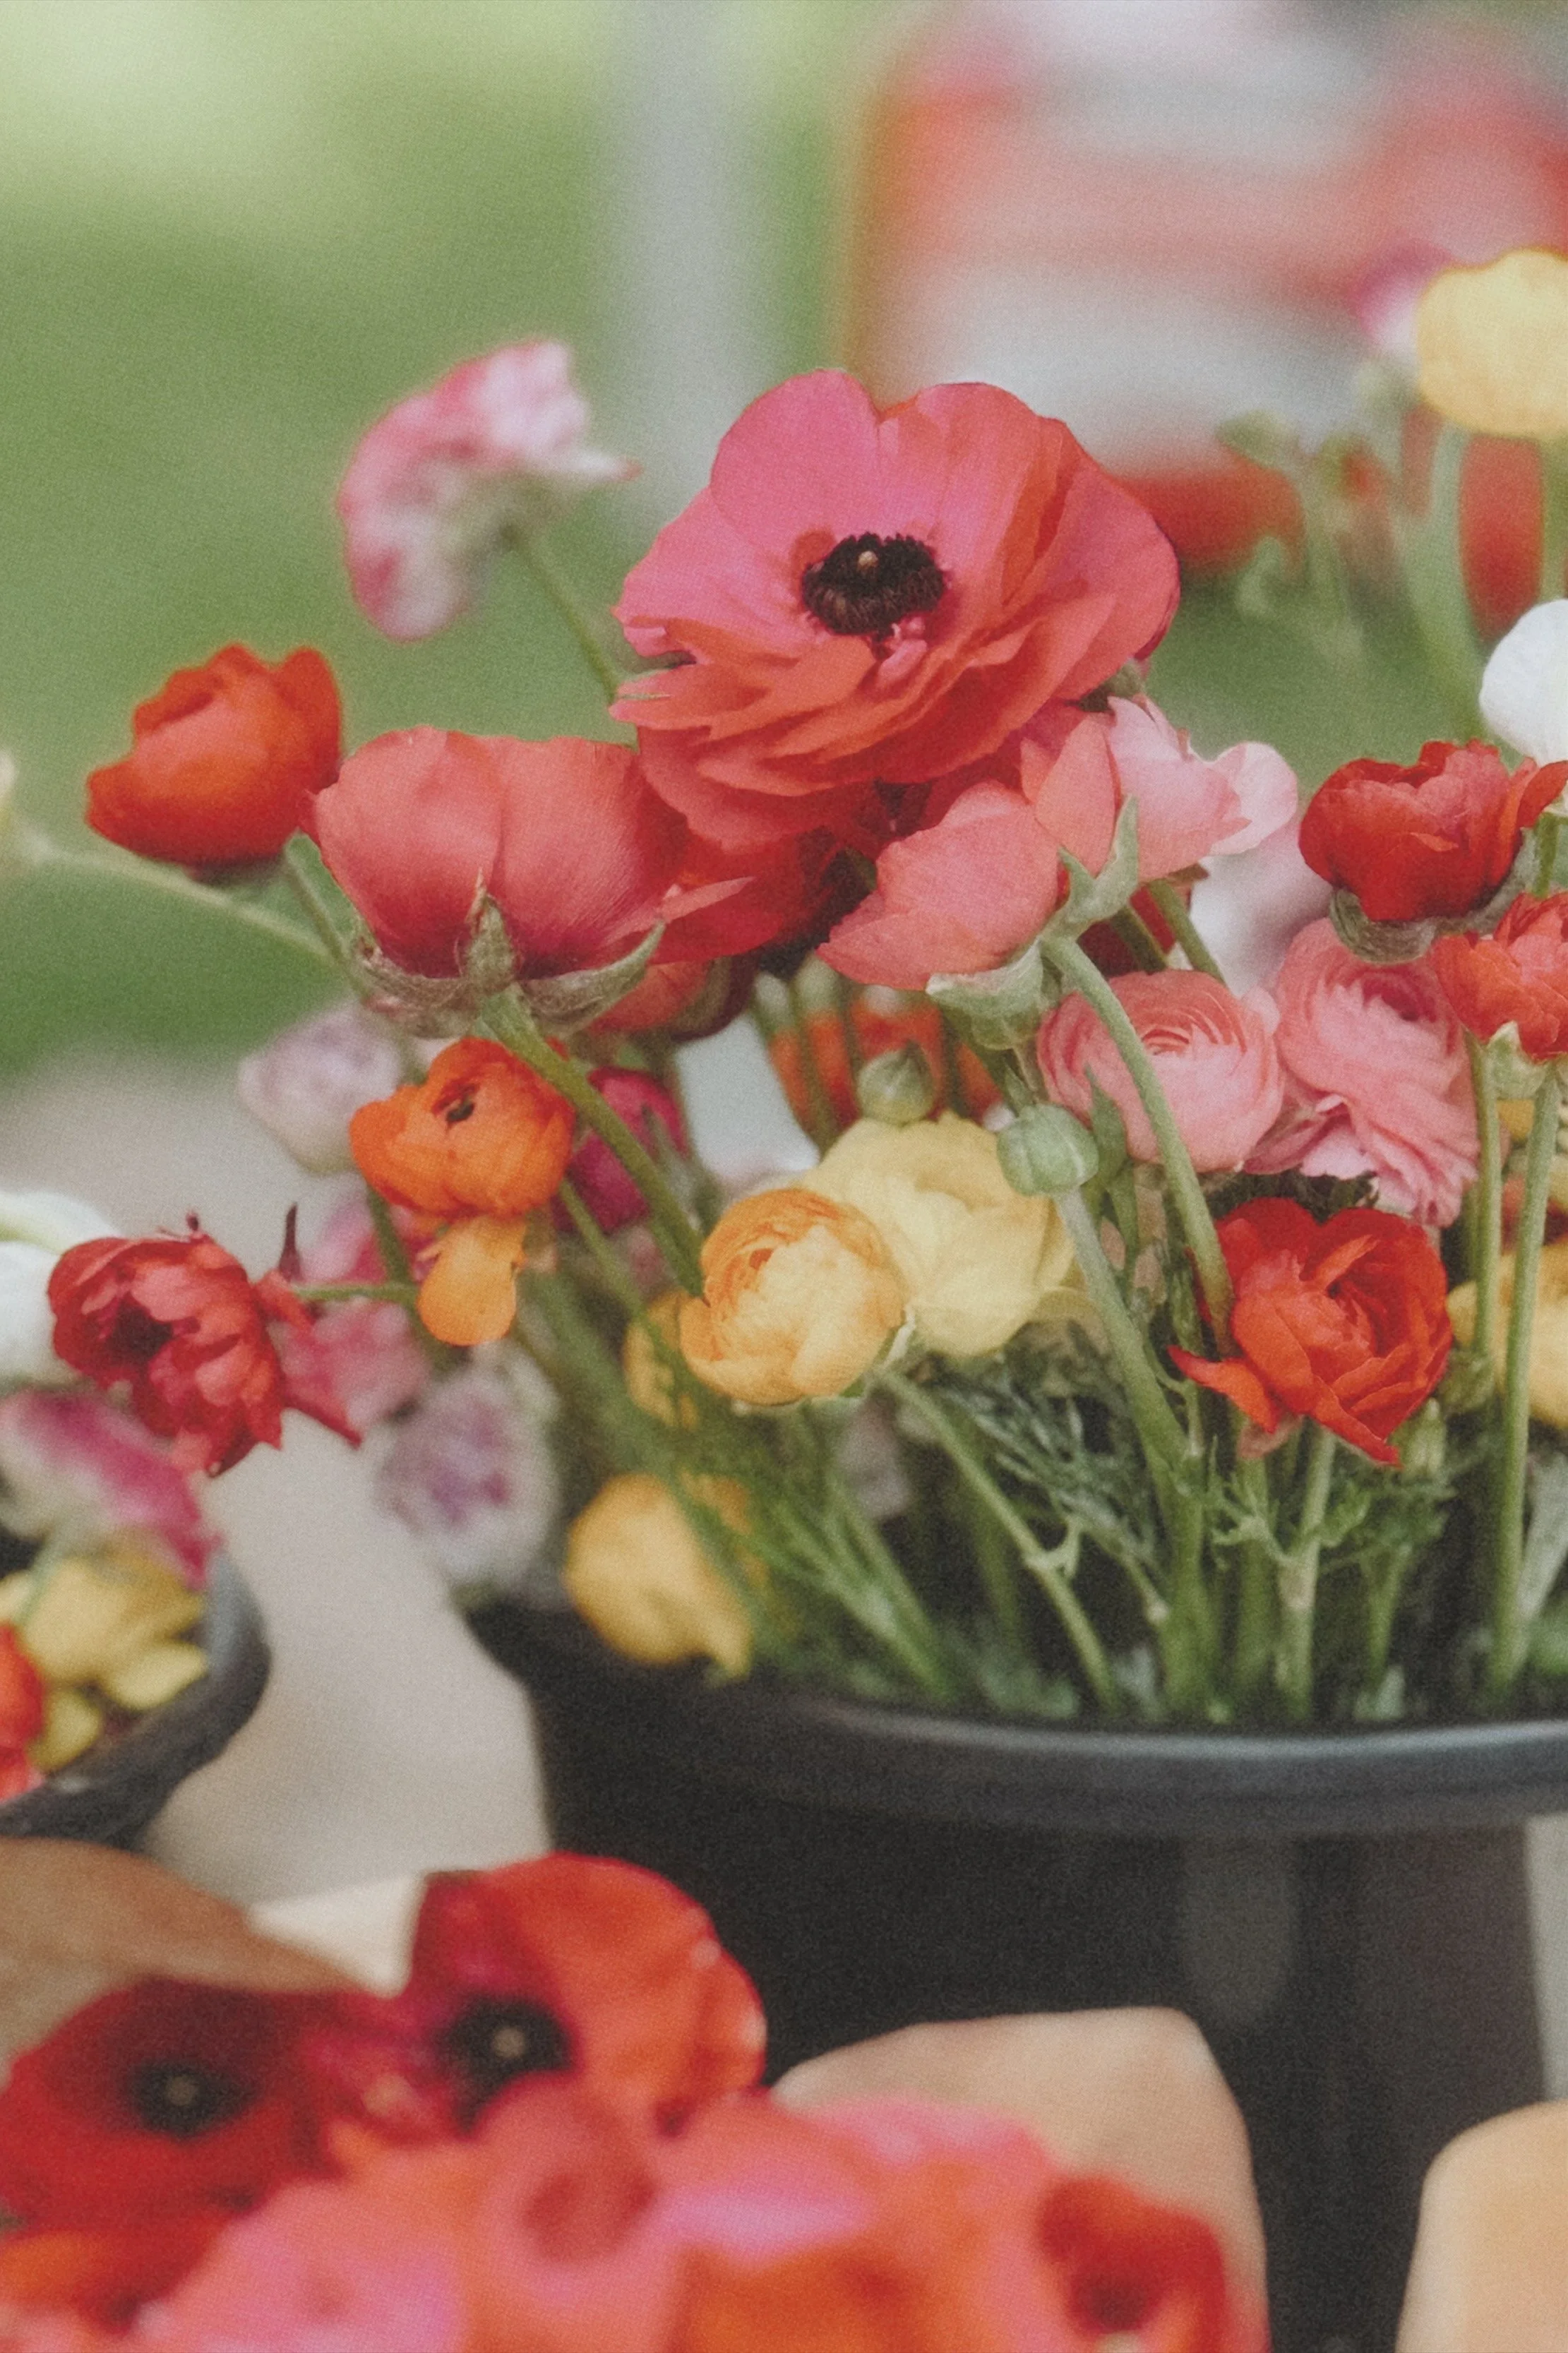
I hope this blog inspired you to give growing ranunculus and anemones a try this year! They’re most definitely a tedious plant that requires a lot of attention in the growth stages, but they produce truly stunning blooms, and make gorgeous bouquets in the spring months while we await the arrival of summer.

* Note: Links and linked products featured in this blog post are commissionable links. Should you purchase a product with these links, I will make a small commission at no additional cost to you.